February 28, 2011

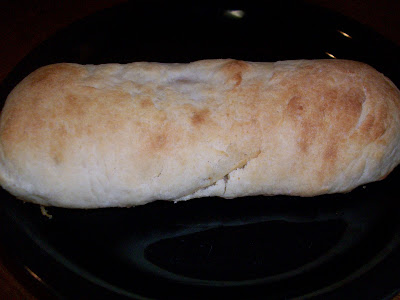
Winner of the Culinary Smackdown Battle - Hand Held Meat "Pies"

Thank you to all who participated in the Culinary Smackdown Battle - Hand Held Meat "Pies" for linking your recipes! They all looked delicious but only one could be crowned the winner.

Mr. Sideline Chef was the inspiration behind the theme for the Battle. He had requested that I try my hand at Jalapeno Cheddar Sausage Kolaches. I figured his request for a meat filled pocket would make for a perfect challenge. I wanted to select a winning entry based off of his taste preferences and something that he would love.

Our original idea was to make our favorite entry and then blog about it today but our laptop crashed and now I am writing this post on a brand new laptop. Thank you Mr. Sideline Chef for saving the day. I have been without Internet for two days and didn't realize what a lifeline having it is. How does one get through a day without it? Since we had no Internet I ran out of time and couldn't get to the winning recipe to make a grocery list and print off the recipe. Such is life.

We have no doubt that the winning recipe would be delicious. The photos are incredible!

The winner of the Culinary Smackdown Battle - Hand Held Meat "Pies" and a $10.00 gift card to Barnes and Noble is Amy with her recipe for Prosciutto di Parma with Smoked Gouda Crescent. Please email me your full name and address so I can get you your gift card!

CONGRATULATIONS AMY!

Looking forward to what you'll come up with for the month of March! Copy and paste the badge and have fun with it! Thank you all once again!

February 26, 2011

Garlic-Dill Crackers

If I had to choose my favorite spice it would come down to garlic and dill. You can imagine how giddy I was when I came across this recipe. Oyster crackers are coated with a vegetable oil spice mixture and then baked until dry.

These crackers on their own are delicious and flavorful. When I added these crackers to my tomato soup for lunch it took an ordinary bowl of soup to a whole new level!

MyRecipes.com and Cooking Light, July 1996
Makes 4 1/2 cups (Serving size = 1/4 cup)

Stars of the Show:
  • 1 1/2 tbsp dry ranch dressing mix
  • 2 tbsp vegetable oil
  • 2 tsp dried dill
  • 1/2 tsp garlic powder
  • 1/4 tsp lemon pepper
  • 1 (11 oz) package oyster crackers (about 4 1/2 cups)
And Action:

Preheat oven to 175°.

Combine first 5 ingredients in a large bowl and stir well. Add the oyster crackers and toss to coat. Spoon mixture onto a baking sheet.

Bake at 175° for 30 minutes stirring frequently. I stirred my batch every 10 minutes. Cool completely and then store in an airtight container. Add to soups, salads, or grab a handful.

Nutritional Information:
Calories: 90 (34% from fat)

Fat: 3.4g (sat 0.3g,mono 0.5g,poly 1.3g)

Protein: 1.4g

Carbohydrate: 14g

Fiber: 0.0g

Cholesterol: 0.0mg

Iron: 0.1mg

Sodium: 338mg

Calcium: 5mg


Tomorrow is the last day to link your recipe to the Culinary Smackdown Battle. I will be announcing the winner the morning of February 28, 2011. Looking forward to seeing what you come up with!

February 22, 2011

Cream Cheese Roll with Powdered Sugar Glaze

Itty bitty and I have been down with a cold the past couple of days and I've had zero motivation to get in the kitchen and put something together. Even Paula Deen's English Peas joke of a recipe seemed like to much of a hassle. I woke up this morning missing the kitchen. The pile of dishes was a bit of an eye sore though but I made it through the chiseling off of food from the plates and scrubbing the counter tops from the science experiment that was beginning to grow. I only joke. Kinda.

Head congestion and all I made a Cream Cheese Braid Cream Cheese Roll. Oh hell. This is why the Pretend Chef shouldn't make anything more complicated than a cup of hot tea when she's sick. When will I ever learn to read a recipe through? 8 hours for the dough to chill, not understanding how to roll the dough after the filling was spread, marking the dough with Xs, and a powdered sugar glaze with no vanilla extract. So I fumbled a bit.

The 8 hours of chilling time for the dough proved to be the easiest part for me. The rolling of the dough made absolutely zero sense. I normally would have Googled a "how to" video but my motivation to do so just wasn't there. I couldn't even figure out how to score the Xs to get that braided look. Needless to say, what I ended up with was a roll with cream cheese filling that oozed out, a hot mess, and a powdered sugar glaze that had no flavor thanks to running out of vanilla extract.
The end result was surprising tasty and moist. Next time the glaze will taste better with the vanilla extract. The cream cheese provides a subtle tang while the dough and glaze provide a sweetness to balance out the "roll".

MyRecipes.com and Southern Living, December 1997
Makes 4 (12-inch) loaves

Stars of the Show for the Dough:
  • 1 (8 oz) container sour cream
  • 1/2 cup sugar
  • 1/2 cup butter
  • 1 tsp salt
  • 2 (1/4 oz) envelopes dry active yeast
  • 1/2 cup warm water (105° to 115°)
  • 2 large eggs, beaten
  • 4 cups all-purpose flour
And Action:

Heat the first 4 ingredients in a saucepan until the butter melts stirring occasionally. Cool to 105° to 115°.

Combine yeast and warm water in a large bowl and let stand for 5 minutes. Stir in sour cream mixture and eggs. Gradually stir in the flour. Cover and chill for at least 8 hours.

Divide the dough into fourths and turn out onto a heavily floured surface and knead 4 or 5 times.

Roll each portion into a 12x8-inch rectangle and spread each rectangle with one fourth of the Cream Cheese Filling (recipe below) leaving a 1-inch border around the edges. Roll up starting starting at a long side, press the seam, and fold the edges under to seal. Place seam side down on a lightly greased baking sheet. Cut 6 equally spaced Xs across the top of each loaf. Cover and let rise in a warm (85°), draft free place, for 1 hour or until doubled in size.

Bake at 375° for 15 to 20 minutes or until browned. Drizzle the warm leaves with the Powdered Sugar Glaze (recipe below).

MyRecipes.com and Southern Living, December 1997
Makes 2 1/2 cups

Stars of the Show:
  • 2 (8 oz) containers cream cheese, softened
  • 3/4 cup sugar
  • 1 large egg
  • 2 tsp vanilla extract
And Action:

Beat all ingredients in a mixer at medium speed until smooth.

MyRecipes.com and Southern Living, December 1997
Makes about 1 cup

Stars of the Show:
  • 2 1/2 cups sifted powdered sugar
  • 1/4 cup milk
  • 2 tsp vanilla extract
And Action:

Stir all ingredients together.

Don't forget about the Culinary Smackdown Battle. You have 6 days left to link your recipe! Entries must be received by February 27, 2011. The winner will be announced the following morning. Best of luck!

For a chance to win a 4-pack of 8-inch GlassDharma Straws check out Smart Girl Reviews and enter now! Tell her the Pretend Chef sent you! Thank you!

February 21, 2011

Paula Deen's English Peas

It's Monday and we all know what a drag it can be. I was sick all weekend with a cold and Mr. Sideline Chef hosted a movie marathon one day and let me indulge in trashy TV show reruns and celebrity magazines the next. No new recipes were whipped up but a clue to check out Paula Deen's English Peas recipe reviews were presented to me in one of my magazines. If you are looking for a few good laughs to perk up your drag ass Monday morning than I suggest you give a few of these hilariously sarcastic reviews a read. How can this even qualify as a recipe? It's like me telling you how to make a peanut butter and jelly sandwich.

Don't forget that February 27, 2011 is the deadline for linking your recipe to the Culinary Smackdown Battle. The winner will be announced the following morning. Best of luck!

February 20, 2011

Apple Cinnamon Oatmeal

So long packets of apple cinnamon oatmeal. This recipe for Apple Cinnamon Oatmeal is part of the 21 Day Vegan Kickstart . I'm not following this diet but have it bookmarked because I read that with trying to lose the last 10 pounds my body is holding onto I need to switch up my eating and try a more vegetarian approach. Mr. Sideline Chef only eats Apple Cinnamon Oatmeal and remembering that this recipe was on that diet meal plan I decided to give it a try. It was a nice change to plain oatmeal for breakfast. Nice to know that this bowl of oatmeal was creamy and delicious and will be satisfying when I do commit to the eating plan.

Makes 2 Servings (Serving size = 1 cup)

Stars of the Show:
  • 1 cup old-fashioned or quick-cooking oats
  • 2/3 cup apple juice concentrate - I used Mott's for Tots Apple Juice with 40% Less Sugar.
  • 1 1/3 cups water
  • 1/2 tsp ground cinnamon
  • 1/2 cup raisins or currants (optional) - Raisins are a cringe worthy food to me. I left them out.
And Action:

Combine oats, apple juice concentrate, water, and cinnamon in a saucepan. Bring to a simmer, cover, and cook 3 minutes. Remove from the heat and stir in the raisins, if desired. Let stand 3 minutes before serving.

Nutritional Information: Per 1 cup serving
Calories: 312
Fat: 2.9 g
Saturated Fat: 0.5 g
Calories from Fat: 8.4%
Cholesterol: 0 mg
Protein: 7 g
Carbohydrates: 66 g
Sugar: 32.9 g
Fiber: 4.7 g
Sodium: 29 mg
Calcium: 51 mg
Iron: 2.8 mg
Vitamin C: 2.1 mg
Beta Carotene: 0 mcg
Vitamin E: 0.3 mg


February 17, 2011

Chris Mooney's Sardine Tartines Platter

As my prize for winning January's Culinary Smackdown Battle - Salmon for my Smoked Salmon Cardamom Spread I received a copy of French Taste: Elegant Everday Eating by Laura Calder. You can imagine how giddy I was when this cookbook finally made it's way into my hands. That very moment I put everything else on hold and set out to bookmark recipes I just had to try.

"Sardines are what you wanted to try first?" I'm sure that's what you are thinking. Being that I am easily overwhelmed when a decision comes down to more than two choices I normally make the first recipe that I've bookmarked. Maybe someday I'll break my habit and select a recipe from the middle of the book. Just the thought alone makes me shutter at this very moment.

Chris Mooney is no one to me. I don't personally know the guy but Laura Calder does. It's a friend of hers from Paris and he had invited her to dinner at his home one night and served sardines on a platter in a tin. Laziness or just breaking the norm she thought of him as a "culinary Kate Moss".

I would have served the sardines in the tin for the sheer reason that I wouldn't want to clean more dishes than necessary. In fact, I prepared this Sardine Tartines Platter as my lunch. A fantastically light lunch it was. I've only recently expanded my canned fish repertoire since starting this blog beyond tuna in water. Anchovies and now sardines. Sardines rank highest on my list in the canned fish category. Less bony than the anchovy and much more flavorful than the tuna.

Courtesy from the back of my Wild Planet's Wild California Sardines in Extra Virgin Olive Oil box: Sardines provide "three times more calcium and phosphorus than milk, more iron than cooked spinach, as much protein as steak, and as much potassium as bananas."
The Sardine Tartines Platter had the drained sardines surrounded by toasted baguette slices, lemon wedges, cold butter, Fleur de sel, and pepper. I tried the suggested serving and decided that the butter was lost or not even needed. The sardine is the star. The baguette provides a great vehicle for the sardines and the squeeze of lemon and a slight sprinkling of Fleur de sel was all that was needed. While eating this I felt like I was transported to a bistro in Paris without the scarf and beret. A light lunch but perfect as an appetizer as well.

 Chris Mooney's Sardine Tartines Platter
French Taste: Elegant Everyday Eating
Makes 4 to 6 Servings

Stars of the Show:

  • 2 tins sardines packed in olive oil
  • 1 baguette, sliced and toasted
  • 1 lemon, cut into wedges
  • cold butter
  • pepper
  • Fleur de sel
And Action:

Open the tins of sardines and drain off the oil. Set the tins in the center of a large platter. Arrange the toasted baguette slices and lemon wedges around the sardines. Serve with the cold butter, a pepper mill for grinding over the top, and a dish of Fleur de sel. Provide knives so everyone can dive in and assemble their own sardine tartines.

For a chance to win a SHEEX Travel Pillow check out Smart Girl Reviews and enter the giveaway. Be sure to let her know the Pretend Chef sent you! Thank you in advance.

For a chance to win a Quart of Tropical Traditions Gold Label Virgin Coconut Oil-Certified Organic check out Smart Girl Reviews and enter the giveaway. Be sure to let her know the Pretend Chef sent you! Thank you in advance.

For a chance to win a large assortment of snacks check out this blog.

Don't forget to link your recipe for the Culinary Smackdown Battle. You only have 11 days now to do so. Get that entry in by February 27, 2011. Mr. Sideline Chef and I will be announcing the winner the following morning. Best of luck!

February 15, 2011

Campbell's® Chicken and Broccoli Alfredo

Our Valentine's dinner wasn't anything fancy schmancy. It wasn't of the finest quality of ingredients or top dollar spent. What our Valentine's dinner was, was a chance to have Mr. Sideline Chef by my side in our small kitchen bumpin' elbows as he helped prepare the noodles and broccoli while I browned the chicken and made the sauce. It was the quality time, although short since dinner was on the table in a snap, that makes our tight knit bond that much stronger. We don't need a day marked in the calendar to tell us when to do something extra special for each other,  although I'm not complaining about my rather large Victoria's Secret gift card. My point is every day with Mr. Sideline Chef is special and I cherish my time with him everyday. I make it a point to tell him and most importantly I show him.

Enough of the sappy crap for another year. On second thought there will be more of it since our 4 year anniversary will be coming up and the fact that I love him more and more every day. Okay. Okay. Enough.

As for the Campbell's® Chicken and Broccoli Alfredo this is a hearty meal that is perfect for a quick weeknight meal. Linguine is mixed with sauteed chicken breasts pieces and broccoli coated in a rich Alfredo sauce. No, I'm not trying to endorse a product here. I just came across the recipe after Mr. Sideline Chef had requested it the other night for a later date.

The original recipe has variations for other protein choices and flavor profiles such as Asian or for a Mexican flair. I can see adding garlic and more Parmesan cheese to the original recipe for more flavor but without the additions this recipe is perfect as wrote. It is sure to become a meal that will make your family's rotation.

MyRecipes.com and Campbell's Kitchen, December 2008
Makes 4 Servings

Stars of the Show:
  • 8 oz linguine
  • 1 cup broccoli flowerets
  • 2 tbsp butter
  • 1 lb boneless, skinless chicken breast cut into bite-size pieces
  • 1 can (10 3/4 oz) Campbell's® Condensed Cream of Mushroom Soup
  • 1/2 cup milk
  • 1/2 cup grated Parmesan cheese
  • 1/4 tsp black pepper
And Action:

Prepare the pasta according to the package directions adding the broccoli to the pot the final 4 minutes. Drain the linguine and broccoli.

Heat the butter in a large skillet over medium high heat. Add the chicken and cook until it's well browned, stirring often.

Stir in the soup, milk, cheese, black pepper, and the linguine/broccoli mix into the skillet. Heat, stirring occasionally, until it starts bubbling. Serve with additional Parmesan cheese, if desired.

I'm marking #13 off my "Stir The Pot" page. 4 down 20 to go.

Just another reminder that the Culinary Smackdown Battle is still open. There are a handful of entries so far and I'd love to see what else will be submitted. You have until February 27, 2011 to get those recipes linked! Best of luck!

February 14, 2011

Coffee and Almond Milk Granita

Happy Valentine's Day!
Reading recipes is an area I really need to work on. I tend to focus on the ingredient list and become so giddy upon discovering all the contents are readily available in my pantry or fridge. I've gotten myself in this pickle before where I hadn't read a recipe through to discover that something needed to be marinated overnight or working with yeast for the first time and not allowing myself enough time for all of the rises to have it ready by dinner.

Just two days ago the weather had us bundled up in jackets and now I couldn't ask for better weather. Sunny and 70. A craving hit yesterday for soaking up the sun and frozen treats. I had come across this recipe for Coffee and Almond Milk Granita and wanted to make it to enjoy outside while watching itty bitty throw rocks, get muddy, and just enjoy our time outside together.

Once again my poor planning meant that we still enjoyed our time outdoors together but without a frozen treat. My hang up came when the almonds needed to soak in the milk overnight and the milk and coffee needed to be frozen longer than the recipe had stated. Thank goodness this weather is here to stay for a couple days and this frozen treat would be ready for today.

Coffee and Almond Milk Granita is a frozen almond latte in a bowl. If you're a coffee lover than this is the perfect treat for you. If your 2 1/2 years old like itty bitty than only Almond Milk Granita for you. If you're not experiencing the kind of weather we are here in Houston, Texas than I am sorry that this will have to stay bookmarked until the nicer weather rolls in. Just keep an eye out on the forecast and when you see the nice weather is two days away then get to making this. If you are looking for a way to warm up than just make the almond milk and pour it into a cup of coffee. Either way this is easy to prepare and provides a creamy and nutty treat.

MyRecipes.com and Sunset, February 2009
Makes 8 Servings

Stars of the Show:
  • 1 1/2 cups whole unblanched almonds - I used sliced almonds since that is what I had on hand.
  • 3 cups milk - I used skim milk.
  • 2/3 cup sugar
  • 2 1/2 cups freshly brewed coffee - The coffee I used was a Gingerbread Coffee from Trader Joes.
And Action:

Preheat oven to 350°. Spread the almonds on a baking sheet in a single layer and toast in the oven until fragrant and browned for about 8 minutes.

Heat the milk in a saucepan over high heat until hot. Stir in the almonds and 1/3 cup sugar, let cool. Chill covered for at least 8 hours or overnight.

Pour the almond-infused milk through a strainer in a metal loaf pan and discard the almonds.

In another metal loaf pan, stir coffee and remaining 1/3 cup sugar until sugar dissolves. Wrap both pans airtight; freeze. After 2 hours, stir slushy liquid with a fork, scraping the sides to create large flakes. Return the pans back to the freezer until completely frozen, about 4 hours.

To serve, spoon half coffee and half almond milk granita into each of the 8 bowls. You can make these up to 4 days ahead of time.

Nutritional Information: (Per serving)
Calories: 266 (54% from fat)

Protein: 7.9g

Fat: 16g (sat 3.2)

Carbohydrate: 26g

Fiber: 2.7g

Sodium: 49mg

Cholesterol: 13mg


Don't forget about the Culinary Smackdown Battle. We're half way through the month and you only have until February 27, 2011 to link up your recipe. Best of luck!

February 13, 2011

Are You Ready For Valentine's Day Yet?

Nothing shows your man you care like a batch of cookies. Why not make him something he'd really love to sink his teeth into.
After showing your man you care why not take care of yourself and enter a giveaway over at Smart Girl Reviews for a chance to win a Facial Care Gift Set by Suuthe. Tell her the Pretend Chef sent! Thank you in advance.

The Culinary Smackdown Battle is still open is anyone is interested in participating. I'd love to see what you all come up with or already have. Check it out to link your recipe! Best of luck. You have until February 27, 2011 to enter and the winner will be announced the following morning.

February 12, 2011

Sweet and Peppery Bacon

The only way to describe this Sweet and Peppery Bacon is candy for breakfast. What better way to take something already not so good for you and make it even worse? By sprinkling it with brown sugar and letting it roast in the oven to get a caramelized peppery crust. Heavenly!

The black pepper to brown sugar ratio is one to one. When I mixed the two and sprinkled the bacon with the mix I second guessed myself and figured the pepper was going to be overpowering for itty bitty to eat. I kept a piece plain just in case so itty bitty could still have something to go along with his breakfast.

While in the oven this smelled like how I envision Paula Deen's home to smell. Bacon and sweetness. It was such a divine smell. If I could bottle that smell I would.

When I pulled the baking sheet out of the oven I was giddy! First bite and all of my doubt melted away. Not overpowered by black pepper. Perfection. Tasted like candied bacon. Breakfast has never tasted so good. I can't wait to make this again along side those Cream Cheese Scrambled Eggs and Yukon Gold Potatoes Sauteed in Clarified Butter. That would be the perfect Valentine's Day breakfast. Why not go ahead and eat some of those Peanut Butter Truffles while you're at it?

MyRecipes.com and All You, December 2010
Makes 24 slices bacon

Stars of the Show:
  • 24 slices bacon
  • 2 to 3 tbsp black pepper
  • 2 to 3 tbsp dark brown sugar
And Action:

Preheat the oven to 400ºF. Line a baking sheet with foil. Mist the foil with cooking spray. Arrange half the bacon slices in a single layer on the foil and sprinkle with half the brown sugar mixture. Roast for 15 minutes. Remove baking sheet from the oven and place bacon on a paper towel lined plate. Pour the grease out of the tray and then repeat with the remaining bacon. Any leftover bacon can be wrapped in plastic wrap and reheated in the microwave. Leftovers? Puh-lease!

Culinary Smackdown Battle... interested in a little challenge? Please check it out and link your recipe. I would love for any and everyone to participate and look forward to seeing what you link, tasting, judging, and then picking a winner. Submit your recipe by February 27th, 2011 because Mr. Sideline Chef and I will be announcing the winner the following morning. Best of luck!

February 11, 2011

Peanut Butter Truffles

Valentine's Day in our household is just another day. Yes, we do the Valentine's card exchange and Mr. Sideline Chef might bring home some flowers or a small present he's picked up. We're not big on the hype of the day itself. We believe that everyday is about each other and our son. No day beats those "just because" days when he comes home with one arm behind his back, a grin on his face, and presenting me with something that made him think of me. This guy has surprised me with a purse, kitchen items, flowers, and such. I don't want him to feel forced to get me something for a "holiday".

As for going out on the actual night itself... are you crazy? You won't catch us waiting more than 15 minutes to be seated at a restaurant. We tend to just rent a movie, make dinner, and sit in our spots on our sectional which happen to be at polar ends. Romantic right? Pssh. Sounds like a typical Saturday night for us.

I'm not a romantic person per say. I do thoughtful things every day. Putting the toilet seat down, picking clothes up off of the floor, cleaning up beard trimmings, etc. Now that's love! I don't tend to surprise him with "just because" gifts, hear me out, he's the bread winner, I bring in zero income so what do I do? "Here hunny, look what I bought you with your money today?" (He does not see it this way, it's our money.) Our solution is this: he can buy whatever his heart wants whenever he pleases. It's really a win win. I don't have to stress over what to buy the man who has everything but not enough sports memorabilia and he gets exactly what he wants.

The only Valentine's Day hype I buy into is sexy lingerie chocolate covered everything. Knowing that my fellow foodies might have a different take on the holiday and actually go all out for their loved ones than this post is mostly for you. You most likely will have all of the ingredients in your pantry and butter in your fridge to whip up these Peanut Butter Truffles. They are incredibly easy to make, taste great, and are covered in chocolate and dusted with cocoa powder.
Chocolate and peanut butter are a flavor combination that make my heart sing and my taste buds dance. When you bite into these the chocolate coating cracks and the peanut butter melts into your mouth with a crunch from the peanuts. Perfect for Everything Covered in Chocolate Valentine's Day!

MyRecipes.com and Real Simple, February 2001
Makes 35-45 Truffles

Stars of the Show:
  • 1 cup chunky or creamy peanut butter - I used extra crunchy peanut butter.
  • 4 tbsp butter, softened
  • 12 oz semisweet chocolate chips
  • 1 cup cocoa powder
And Action:

Mix the peanut butter and butter in a bowl and mix well. Spread the mixture evenly into a baking dish and place in the freezer for 30 minutes. Using a melon baller (I used a tablespoon), form rounds and place them on a wax paper lined baking sheet. Place them back in the freezer for 15 minutes to harden.

While the peanut butter rounds are hardening melt the chocolate. I placed the chocolate chips in a microwaveble bowl and put them in the microwave for 30 seconds and stirred until completely melted. Let the chocolate cool to room temperature.

Drop the peanut butter rounds into the chocolate turning to coat and then retrieve them with a fork to allow the excess chocolate to drip off. Garnish immediately with a dusting of cocoa powder or whatever other topping you prefer, salted peanuts maybe? Yummy.

Store these truffles in the fridge in a tightly sealed container for up to two weeks. How they will last that long is beyond me.

Nutritional Information:
Calories: 93 (1% from fat)
Fat: 7g (sat 3g)
Protein: 2mg
Carbohydrate: 8g
Fiber: 2g
Cholesterol: 3mg
Iron: 1mg
Sodium: 31mg
Calcium: 9mg

Have these for dessert and maybe make something that you can enter for the Culinary Smackdown Battle while you are at it. The entries submitted already look incredibly tasty and Mr. Sideline Chef and I are looking forward to tasting and judging. Best of luck to those who enter and thank you in advance for participating! You have until February 27th, 2011 to link your recipe and the winner will be announced the following morning.

February 09, 2011

Cheddar Bay Biscuits

We all know those infamous Cheddar Bay Biscuits from Red Lobster. You know those ones that the dietitians tell us to run away from and while we're at it to reduce our sodium intake and do another 50 crunches. Those ones. While Mr. Sideline Chef would tell you these are the main reason he goes to Red Lobster I sing a different tune and look forward to their Caesar Salad without croutons and drool over the menu options before settling on something that isn't probably the healthiest choice.

Just last month Mr. Sideline Chef requested I make rolls for dinner. I made those Honey Yeast Rolls that I thought were incredibly delicious but missed the mark for him. He was referring to something similar to what Red Lobster made. Rolls, biscuits, oh hell, in his mind what's the difference.

I searched the Internet and decided to make the recipe I found first since it sounded simple and I already had all of the ingredients on hand. Simple this recipe is. Flavorful as well. How do these compare to Red Lobster's? Close. The difference is that these are a cheese biscuit with the garlic butter topping. Their biscuits seem to have the cheesy garlic taste baked in and brushed on top as well. When I make these next time I will be sure to mix the topping ingredients into the biscuit mix and then top with extra garlic butter goodness. Then they would be perfect.

Now I know when Mr. Sideline Chef requests rolls for dinner I'll have a go-to recipe. Now if only I could recreate their Caesar Salad and any one of their seafood dishes. Crave worthy!

Allrecipes.com
Makes 20 Servings

Stars of the Show:
  • 4 cups baking mix - I used Bisquick Heart Smart.
  • 3 oz shredded sharp cheddar cheese
  • 1 1/3 cups water
  • 1/2 cup melted butter
  • 1 tsp garlic powder
  • 1/4 tsp salt
  • 1/8 tsp onion powder
  • 1/8 tsp dried parsley
And Action:

Preheat oven to 375 degrees. Spray a baking sheet with nonstick cooking spray. In a large mixing bowl combine the baking mix, cheese, and water. Mix until a firm dough forms. Scoop dough onto the baking sheet using two spoons. Be sure to leave space between each dough scoop. Bake for 10-12 minutes or until golden brown. Combine the melted butter, garlic powder, salt, onion powder, and dried parsley in a small bowl. Brush over the rolls immediately out of the oven.

Don't forget about the Culinary Smackdown Battle! There are 3 great entries so far and would love to see more of what my fellow foodies have or will come up with! Looking forward to tasting and judging and announcing the winner on February 28th, 2011.

February 06, 2011

Spring Chicken with Leeks and Peas Served with Lemon Rice

"Feel free to make this dish in all four seasons. I just call it 'Spring Chicken' because it tastes light and crisp, like spring air, and because 'Spring Chicken' sounds more appetizing than 'Leeky Chicken,' which was what I called an earlier version of the recipe." - A side note from Rachael Ray's cookbook. 

Omit the chicken and you've got a quick and easy meal to put together for "Meatless Monday". The rice is refreshing with the lemon peel stirred in and is then topped with the chicken, leeks, and peas with white wine. The white wine and veggies with the lemon rice is what really stands out in this meal. The chicken is bland and adds nothing more than a lean protein to this meal. I think that shrimp would do much better in this dish.

This dish came together in less than 30 minutes making it an ideal meal for a weeknight. The prep time and clean up was just as quick.

The dish is light and well balanced with reasonable taste. Chicken tends to be our go-to protein of choice in our household since it tends to be lighter on our grocery budget. Whichever way you choose to make this: meatless, with chicken, or shrimp this will not disappoint.

Spring Chicken with Leeks and Peas Served with Lemon Rice
Rachael Ray 365: No Repeats: A Year of Deliciously Different Dinners
Makes 4 Servings

Stars of the Show:
  • 2 cups chicken broth
  • 1 cup white rice
  • zest and juice of 1 lemon
  • 3 tbsp olive oil
  • 1 tbsp butter
  • 1 1/2 to 2 lb chicken breast cut into bite-size pieces
  • 2 medium leeks, trimmed of tough tops and roots, slice in half lengthwise then into half moons - Be sure to rinse the leeks well since dirt and grit gets in between the layers.
  • 1/2 cup dry white wine - You may also substitute chicken broth is you don't have the wine on hand. I recommend the wine though since I feel this gave the dish an incredible amount of flavor.
  • 10 oz frozen peas
  • salt and black pepper
  • handful of fresh flat-leaf parsley, finely chopped - I used dried parsley.
And Action:
Bring the chicken broth to a boil in a small pot. Stir in the rice, lemon zest, and 1 tbsp olive oil. Return to a boil, then reduce the heat to a simmer and cover the pot. Cook for 17-18 minutes or until tender.

Heat a large nonstick skillet over medium-high heat. Add the remaining 2 tbsp of olive oil and the butter. Once the butter melts into the oil add the chicken to the pan and saute until lightly golden on both sides for about 4 minutes.

Cook the leeks with the chicken until they wilt down, 3 minutes. Add the white wine to the pan and scrape up any pan drippings. Add the peas and heat through, another minute or two. Turn off the heat and season with salt and pepper. Drizzle the lemon juice over the chicken and leeks.

Fluff the rice with a fork. Add the parsley and toss the rice to combine.

Pile the chicken and leeks on dinner plates and top with a small mound of lemon rice. Rachael Ray suggested using an ice cream scoop to serve the rice which is a novel idea but when you've got a hungry guy and toddler ready to eat presentation normally goes by the wayside.

This recipe was a great alternative to the standard sauteing of chicken in olive oil for a quick protein for dinner. Another "Stir The Pot" item on the list gets to be marked off, number six, chicken. Although not anywhere as good as the Chicken Francese with Wilted Spinach it was delicious enough to fit the bill. 2 items down 22 to go!

Don't forget about the Culinary Smackdown Battle! Check it out to link your recipe and for a chance to win a prize! Best of luck!

February 03, 2011

Reminder: Culinary Smackdown Battle - Hand Held Meat "Pies"

Just wanted to remind everyone of the Culinary Smackdown Battle for the month of February. There are a couple of entries already and would love to see what more foodies come up with or have already come up with! Make sure to link up for a chance to win a prize! Mr. Sideline Chef and I will be making the recipes and judging the entries and will announce the winner on the morning of February 28, 2011!
After you link up your recipe be sure to head over to Charm & Salt for a fantastic Valentine's Day giveaway!

February 02, 2011

Jalapeno Cheddar Sausage Kolaches

As of yesterday February's Culinary Smackdown Battle - Hand Held "Pies" was officially launched. Who  better to set the tone than myself? Jalapeno Cheddar Sausage Kolaches.

I first met Mr. Sideline Chef while I was living in the Pacific Northwest in Washington State. I consider the Pacific Northwest my "back home" even though I was raised in Las Vegas, Nevada for the majority of my life. Rainy weather, the Pacific Coast, the rainy weather, and did I mention the rainy weather? I loved it all.

Moving to Texas seemed foreign to me when Mr. Sideline Chef took me South to get me acquainted with where my new home with him would be. Houston, Texas. Ick! The images I had painted in my head were those of men in cowboy hats, horses as the main mode of transportation, and a more "Western" feel. Not in the least bit. This wasn't West Texas. Houston looked like a garbage hole. To this day, 3 1/2 years later, I have not grown to love it here. I'll always love the Oregon/Washington area and Ohio/Pittsburgh (Mr. Sideline Chef is from this area) as my home.
When searching for our first place to live we were touring some apartment buildings and our stomachs began to growl. It was around brunch and didn't really know the area that well. We asked the leasing agent for a recommendation on where to eat. "There's a kolache..." "Bless you!" I interrupt. "...place just right down the road."

Kolaches? Obviously a Southern thing. We blew it off the way that a Texan would probably do to a coffee stand on every corner in the Pacific Northwest. We settled on a hole-in-the-wall donut shop. I don't know why they called it a donut shop when the number of kolaches outnumbered the donuts.

Curiosity tends to get the best of Mr. Sideline Chef and if you tell him "don't do it" he's going to do it. He ordered the infamous Jalapeno Cheddar Sausage Kolache. A sausage flecked with jalapenos and cheddar chunks was nestled between a pillowy bread crust. It was delicious.

To this day we frequent the donut shop. Not for the donuts but for the kolaches. Itty bitty would tell a different tale from the tell tell sign of maple glaze around his mouth and those giveaway sticky fingers. I have never thought to even make my own. That is, until one morning when returning home Mr. Sideline Chef tells me, "I thought you were the Pretend Chef." Heard him loud and clear.

Making kolaches is easier than getting dressed (even on a Sunday morning), loading itty bitty into the car, and driving a mile down the road and walking into a donut shop and picking a few of them up. Okay. That might be a stretch. The donut shop provides convenience but making them provides the quality. The hardest part is patiently waiting for the dough to rise two separate times or maybe it's picking your filling? Make them and find out.

You can even make these ahead, freeze, and reheat in the microwave for a quick grab and go breakfast.

Jalapeno Sausage Kolaches
Makes 12 Servings

Stars of the Show for the Dough:
  • 2 (1/4 oz) packages dry yeast
  • 1/2 cup lukewarm water
  • 1/4 cup butter, softened
  • 1/4 cup shortening
  • 1/4 cup sugar
  • 2 egg yolks
  • 2/3 cup milk
  • 1 tsp salt
  • 4 cups flour
And Action:

In a small bowl dissolve the yeast in the warm water and set aside.

In a large bowl cream together the butter, shortening, and sugar until the mixture is light and fluffy.

Mix in the egg yolks, milk, and salt making sure to combine well.

Stir the dissolved yeast and flour and mix until the ingredients are thoroughly blended into a soft dough.

Place the dough in a large bowl that has been coated with cooking spray making sure to coat the top of the dough. Cover the bowl with a towel and set in a warm place to rise for 1 hour or until doubled in size.

Grease a baking sheet.

Divide the dough into 12 even pieces and roll into a ball. Flatten each piece into a circle and transfer them to the greased baking sheet. Place about 1 inch apart.

Let them rise again in a warm place for 45 minutes or until doubled in size.

Stars of the Show for the Filling:
  • 12 Jalapeno Cheddar Sausages
  • pickled jalapenos (optional)
  • shredded cheddar cheese (optional)
*You can get creative and use whatever other ingredients you would like. Ham and Cheese. Bacon, Egg, and Cheese. The possibilities are endless. Just follow the next steps for filling.

And Action:

Failed first attempt. Be sure not to over stuff the centers!
Place the filling ingredients in the center of the dough circles being careful not to over stuff or else you will tear the dough like my failed first attempt. Lesson learned. Fold one side of the dough over the filling and roll to the other end of the dough. Pinch to seal. Liberally brush the tops with melted butter.
Bake at 425 degrees for 10-12 minutes or until golden brown.

These are best enjoyed when they are fresh from the oven but cooled down enough to handle.

#17 is now marked off on my "Stir The Pot"  page!

Make these or another hand held meat "pie" and be sure to link your recipe to the Culinary Smackdown Battle - Hand Held "Pies".  I would love to see the flavor combination you come up with! Your entry might win you the prize!

February 01, 2011

Strawberry Raspberry Salad

This mixed greens salad is dressed in a homemade strawberry and raspberry dressing. The color from the dressing is a vibrant red and really pops next to the lettuce. The taste is sweet but with a slight tartness. This salad is refreshing and a great new alternative. The addition of fresh berries makes me think of summer even though the weather is telling me otherwise.

I could see having this for lunch or as a side dish with dinner like I did last night with the Classic Parmesan Scalloped Potatoes. Meatless Monday accomplished. The Strawberry Raspberry Salad is so quick and easy to whip together. The food processor does the work for you.

Strawberry Raspberry Salad
Pillsbury: Quick Cooking: For One, Two, or a Few!
Makes 2 Servings
Stars of the Show:
  • 1/4 cup fresh or frozen raspberries, thawed
  • 1/4 cup fresh or frozen strawberries, thawed
  • 2 tsp sugar
  • 1 tbsp red wine vinegar
  • 3 fresh basil leaves chopped or 1/4 tsp dried basil
  • 2 cups torn mixed salad greens
And Action:

Combine all the ingredients from the raspberries to the basil leaves in a food processor and blend well. Strain if desired. Serve over the mixed salad greens.

Nutritional Information:
Calories: 35
Fat: 0g
Protein: 1g
Carbohydrate: 6g
Fiber: 2g
Cholesterol: 0mg
Sodium: 5mg

The Culinary Smackdown Battle for February is now open! Check it out to link your recipe and for a chance to win a prize. I know you're wondering what the battle challenge could be. Go ahead check it out!

I'm linking this recipe to:


Related Posts Plugin for WordPress, Blogger...