June 30, 2011

Easy Bean Dip


This bean dip is easy. Three ingredients whizzed in the food processor and you're done. Perfect with baked tortilla chips, spread onto a tortilla, or veggies to be dunked into. No more need to buy store bought bean dip and I think this would easily replace refried beans as well.

Makes 6 Servings (Serving size = 1/4 cup)

Stars of the Show:
  • 1 15-ounce can black beans, drained and rinsed               
  • 1 cup salsa
  • 1/2 teaspoon ground cumin (optional)
And Action:

Combine all ingredients in a food processor and process until smooth.

Nutritional Information Per Serving:
Calories: 81
Fat: 0.4 g
Saturated Fat: 0.1 g
Calories from Fat: 4.2%
Cholesterol: 0 mg
Protein: 4.7 g
Carbohydrates: 15.4 g
Sugar: 2.7 g
Fiber: 3.8 g
Sodium: 280 mg
Calcium: 47 mg
Iron: 1.6 mg
Vitamin C: 6.4 mg
Beta Carotene: 172 mcg
Vitamin E: 0.6 mg


June 27, 2011

Pinteresting #1

I was recently introduced to the website Pinterest. I love browsing through people's photos and decided to share some of my favorites. Credit is given to the source. Please click on the links to give the photo owner's some love!

Stuffed Crispy Treat Goodness by Love From The Oven
Dessert Wine Gelees with Citrus Fruit by Martha Stewart Weddings
Fold Flat Grater by Joseph Joseph


Sweet Sipping: Just Married Wine by Lovely Bride

I Love You More Than Diet Coke by retrostiletto

Spring Cleaning Tips by Martha Stewart


Cherry Baskets by SugarCubeVintage
Coolest Kids Lunches Ever by Hostess

Alice In Wonderland Cake by Lenny's Alice In Wonderland Site

4th of July Dessert by Supernatural Botanicals

Arizona Backyard Landscaping Ideas by Backyard1.com

Breville Pie Maker by Uncrate


Chanel Cupcakes by Another


June 26, 2011

Inventive

June 25, 2011

Southern Beans and Greens

My first experience and taste of soul food was at a hole-in-the-wall joint, My Food's All That. Being a Southern transplant from the Pacific Northwest I was eager to try some down home cookin'. Walking through the doors for the first time was a little bit intimidating. I felt out of place but that feeling didn't last long when the owner, who also mans the register and takes orders, greeted me with a friendly smile and a gracious hello.

The menu had so many options I didn't know where to start so I asked what he recommended. Seasoned chicken breast over rice and gravy with two generous sides, fried corn on the cob and some beans and greens. Love at first bite. Thankfully the portions were so large that a to go container was necessary and I got to enjoy another meal out of it.

It was a memorable meal. I often times have cravings for their food.

I don't generally eat a meal out and race home to try and recreate it. This was one of those exceptions. A 30 minute drive isn't convenient. If I'm on that side of town then it's a for sure stop. Never a disappointment.

While searching online for Southern Beans and Greens I had come across the 21-Day Vegan Kickstart. There was a recipe for Southern Beans and Greens. Healthy. Bonus.

Such a simple and hearty meal to make. Perfect for a "Meatless Monday" when paired with rice or another grain. Beans of choice are simmered in vegetable broth with garlic and kale then tossed with olive oil, salt, pepper, and splashes of hot sauce. I served it over rice. While not exactly the same as My Food's All That it was a notch below. Deliciousness. Yummy!

These Southern Beans and Greens would make a great topping for cornbread, filling for a pita pocket, or scooped up with tortilla chips.

Makes 4 Servings (Serving size = 1 cup)

Stars of the Show:
  • 1 cup vegetable broth or water
  • 3 cups drained cooked or canned beans (your choice of any kind) - I used black beans. They are my favorite.
  • 1/2 teaspoon crushed garlic
  • 4 cups chopped fresh kale, stems and center ribs removed, lightly packed
  • 1 teaspoon olive oil
  • salt, to taste
  • black pepper, to taste
  • Tabasco sauce, to taste
And Action:

Combine beans, broth or water, and garlic in a large saucepan. Place chopped kale on top of beans and bring to a boil. Cover, reduce heat to low, and simmer until kale is tender, about 15 to 20 minutes. Remove from heat and stir in oil, salt, black pepper, and Tabasco sauce to taste.

Nutritional Information Per Serving:
Calories: 219
Fat: 1.9 g
Saturated Fat: 0.3 g
Calories from Fat: 7.8%
Cholesterol: 0 mg
Protein: 14.4 g
Carbohydrates: 38.4 g
Sugar: 1.9 g
Fiber: 9.9 g
Sodium: 424 mg
Calcium: 176 mg
Iron: 5.7 mg
Vitamin C: 30.8 mg
Beta Carotene: 6207 mcg
Vitamin E: 2.1 mg

June 24, 2011

Kwick Kale

Simple side dish of boiled kale seasoned with rice vinegar. Quick, easy, and delicious.

Makes 4 Servings

Stars of the Show:
  • 1/2 cup water
  • 1 bunch kale (any variety), 6 to 8 cups washed and chopped
  • 2 tsp seasoned rice vinegar
And Action:

Heat water in large skillet with a lid. When boiling, add kale. Cover and cook over medium heat until greens are bright green and tender, about 5 minutes. Sprinkle with vinegar and stir to heat. Serve warm.

Nutritional Information Per Serving:
Calories: 35
Fat: 0.4 g
Saturated Fat: 0.1 g
Calories from Fat: 11.6%
Cholesterol: 0 mg
Protein: 2.1 g
Carbohydrates: 7.1 g
Sugar: 1.8 g
Fiber: 2.2 g
Sodium: 66 mg
Calcium: 81 mg
Iron: 1 mg
Vitamin C: 45.6 mg
Beta Carotene: 9084 mcg
Vitamin E: 0.9 mg

June 22, 2011

Berry Applesauce

Homemade applesauce was a staple in my mama's kitchen. Many nights we would have pork chops with chunky applesauce. Applesauce with breakfast the next morning and then have it packed into our school lunches. This Berry Applesauce can be served hot or cold and makes for a healthy snack, topping for waffles, and even a great choice for those who make their own baby food (omit the cinnamon). Blueberries give this applesauce a deep purple hue and pack a heavy dose of potent cancer fighting antioxidants. Feel free to use whatever berries you have on hand.

Makes 4 Servings (Serving size = 1/2 cup)

Stars of the Show:
  • 2 cups peeled, cored, and diced apple - I used red delicious apples.
  • 2 cups fresh or frozen strawberries, blueberries, or raspberries - I used blueberries.
  • 1⁄2 cup frozen apple juice concentrate, thawed
  • 1 teaspoon ground cinnamon
And Action:

Combine all of the ingredients in a medium saucepan. Bring to a gentle simmer, cover, and cook over very low heat for about 25 minutes, or until the apples are tender when pierced with a fork. Mash lightly with a potato masher or purée in a food processor, if desired.

Stored in a covered container in the refrigerator, leftover Berry Applesauce will keep for up to 3 days.

Nutritional Information Per Serving:
Calories: 108
Fat: 0.4 g
Saturated Fat: 0 g
Cholesterol: 0 mg
Protein: 0.8 g
Carbohydrates: 26.9 g
Sugar: 20.1 g
Fiber: 2.7 g
Sodium: 11 mg
Calcium: 29 mg
Iron: 0.9 mg
Vitamin C: 49.2 mg
Beta-Carotene: 13 mcg
Vitamin E: 0.4 mg

For a chance to win a copy of Food Cures or Slim & Scrumptious check out Blogs Got Heart and enter the giveaway.


June 19, 2011

Office Humor


June 18, 2011

Vanilla Cupcakes with Buttercream Icing

June is a busy month for us with birthdays. 
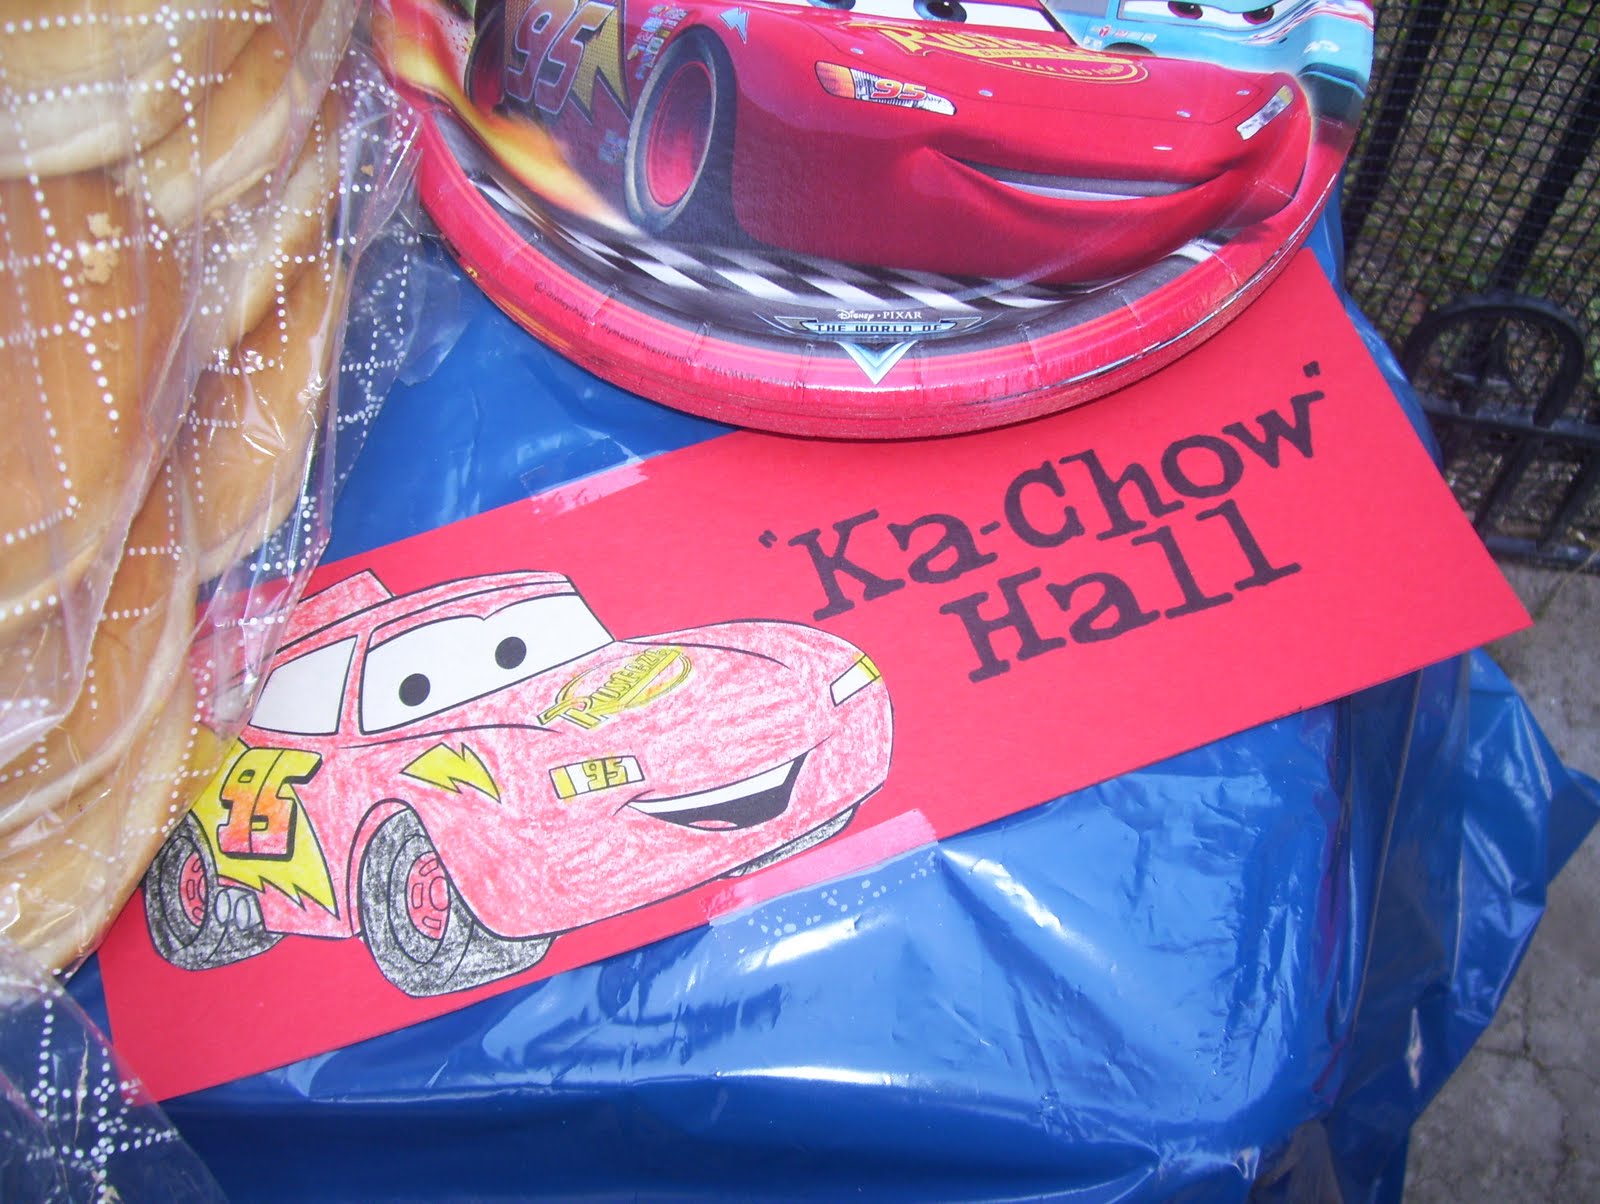
Itty Bitty's birthday  (click the link for a look at his Disney Cars themed party) kicks off the start of the month, mine follows two weeks later, my mama's and bestest friend the following week, and at the end of the month is my grandmother's birthday. I'm not even about to start the list of acquaintances I have whose birthday's are mixed into that jumble.

The wallet is lighter the month of June but our stomachs are heavier with all of the yummies we get to eat at the celebrations.

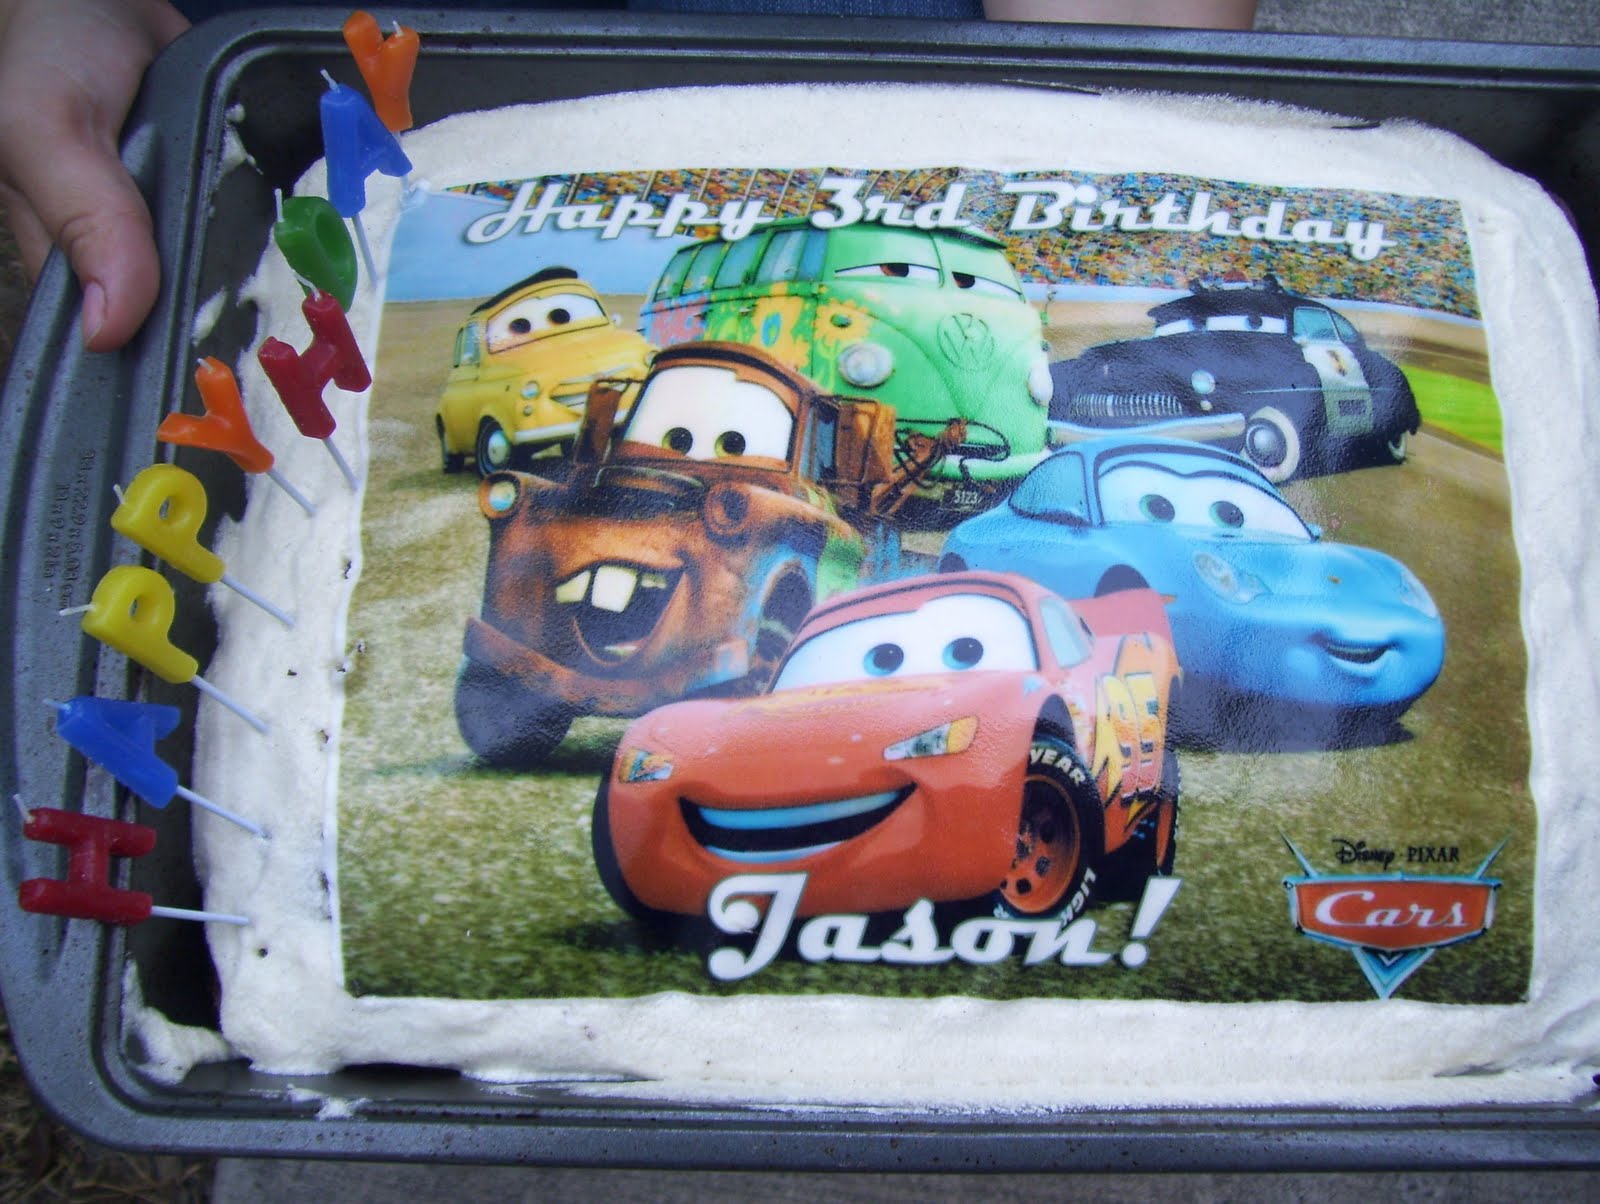
Instead of cupcakes this year for Itty Bitty's birthday I decided to make him a cake since I was sold on buying an edible cake image that had been customized just for him. However, I did buy Disney Cars cupcake liners just in case I had to go to my Plan B if the idea failed.

He's been asking for cupcakes ever since. Why not make cupcakes in spirit of all the June birthdays?


I decided on Vanilla Cupcakes with Buttercream Frosting from my cookbook, Good Things For Kids: 63 Fun and Easy Recipes the Whole Family Will Love.

It obviously wasn't my day to put on a baker's hat. The amount of batter the recipe called for didn't fill up all of the cups 3/4 full so I didn't get that domed top. Sigh. When making the icing, cringe, I didn't have enough egg whites, whisking the sugar and egg whites over simmering water was new to me, and then having to form stiff peaks... OH NO! Itty Bitty requested blue frosting and I ended up with dye all over my hands and had a get together with a friend not even an hour later. Double sigh.

After letting the cupcakes cool I frosted them. Itty Bitty had actually decided to park himself at the table and waited patiently for me to finish frosting them all. I place the cupcake in front of him and after one bite he told me, "No thank you mama. I get down."

He's not much for sweets unless it's chocolate so I figured this was the case.

I took one bite of it and realized why he didn't want it. The cupcake did not turn out light and fluffy. It even had crater sized holes in them!?! The icing was delicious though. Sigh. No idea how I went wrong.

Needless to say, I, myself will not be making this recipe again. I was really looking forward to being able to mark off number 3 from my "Stir The Pot" page. Sigh.

Vanilla Cupcakes with Buttercream Icing
Good Things for Kids: 63 Fun and Easy Recipes the Whole Family Will Love
Makes 2 Dozen Cupcakes and 5 1/2 Cups Icing

Stars of the Show for the Cupcakes:
  • 3 cups all-purpose flour
  • 1 1/2 tsp baking powder
  • 3/4 tsp salt
  • 3/4 cup (1 1/2 sticks) unsalted butter, room temperature
  • 1 1/2 cups sugar
  • 4 large eggs
  • 2 tsp pure vanilla extract
  • 1 1/4 cup milk
And Action:

Preheat oven to 350 degrees. Line two 12-cup cupcake pans with paper lines. In a medium bowl, whisk together flour, baking powder, and salt. In a large mixing bowl, cream together butter and sugar until light and fluffy, about 4 minutes. Add eggs one at a time, mixing until incorporated. Scrape down sides of bowl, beat in vanilla.

To bowl with butter mixture, add flour mixture and milk alternately, beginning and ending with flour. Scrape down sides and bottom of bowl.

Divide batter evenly among liners filling about 3/4 full. Bake until tops spring back when touched about 20 minutes. Rotate pans once if needed. Transfer to wire rack and let cool completely before decorating as desired. Cupcakes can be baked 1 week ahead and frozen. Place on a baking sheet and freeze, then store in a resealable plastic bag in the freezer. Decorate the cupcakes no more than a day before serving.

Star of the Show for the Icing:
  • 1 1/2 cups sugar
  • 6 large egg whites
  • 2 cups (4 sticks) unsalted butter, cut into small pieces, room temperature
  • 1 tsp pure vanilla extract - I used vanilla bean paste. You can see the flecks of vanilla bean in the frosting. Yummy!
  • food coloring, if desired
And Action:

In a heatproof bowl set over simmering water, whisk sugar and egg whites until warm and sugar has dissolved, about 5 minutes. Remove from the head. Using an electric mixer, beat mixture on medium speed until completely cooled and stiff peaks have formed, about 10 minutes.

Add butter one piece at a time, beating after each addition until combined. Add vanilla. Beat on low speed until smooth, about 5 minutes. Stir in food coloring. If not using immediately, refrigerate buttercream for up to 3 days. Bring to room temperature, beat until smooth before using.

Photo from: Good Things for Kids: 63 Fun and Easy Recipes the Whole Family Will Love
Although good on paper and photographs these just didn't turn out for me. Bummer. There is a really cute decorating tip in the cookbook. Cupcake Clowns. For the clown's hat, score a circle in the center of cupcake. Cut a cone with knife at an angle, rotating cupcake as you go. Using a wide round piping tip pipe buttercream into the cavity and on top for the head. Use mini gumdrops for the collar and a cinnamon candy for the nose; insert chocolate sprinkles for the eyes. The hat has a buttercream icing pom-pom covered in multicolored sprinkles. Cuteness!!!

June 16, 2011

"Stir The Pot"


Today is my birthday. I turned 24. I failed to complete my 24 x 24 "Stir The Pot" challenge. I have updated my "Stir The Pot" page and am ready for a new year of new recipes. Check out my 25 x 25.

June 15, 2011

Giveaways

For a chance to win 4 JK Gourmet Granola Bars head over to Healthful Pursuit and enter the giveaway. Tell Leanne the Pretend Chef sent you!

For a chance to win a Bodum Chambord Grill Pan head over to A Spicy Perspective and enter the giveaway. Tell Sommer the Pretend Chef sent you!

June 14, 2011

Taste of Summer Tilapia

My Summer 2011 catalog for Penzeys Spices arrived in the mail a couple weeks ago. The world is put on pause when a cookbook or any booklet containing recipes is placed in my hands. I sat down, feet propped up, Itty Bitty down for nap, and I thumbed through the catalog. Blissful.

I wish listed for spices and read a few of the bios and bookmarked the recipes I'd like to try.


When I came across this recipe for Taste of Summer Tilapia I knew I had to try it. Tilapia is a fish that is recommended on the Flat Belly Diet so it's a staple fish in my freezer. Normally I just bake it or throw it on the grill. I'm always looking for new ways to jazz up my food and always ready to try a new recipe.

Lunch time rolled around and I couldn't get the recipe out of my head. Fish recipes make me giddy. A growling stomach sealed the deal. There is virtually no prep work and the clean up is a snap. Tilapia fillets are sprinkled with seasoning and then coated in seasoned flour and then pan fried. They get drizzled with butter (optional), squeezed with lemon, and sprinkled with parsley.

Yum and yum! Crunchy outside with a moist and flaky inside. This is a well seasoned tilapia fillet.

Perfect pairing is grilled or roasted veggies.

Taste of Summer Tilapia
Penzeys Spices Catalog, Summer 2011
Makes 6 Servings (Serving size = 1 fillet)

Stars of the Show:
  • 6 tilapia fillets, thawed
  • 1/2 cup all-purpose flour
  • 1/2 tsp seasoned salt
  • 1/4 tsp ground black pepper
  • 1/4 tsp lemon pepper
  • 1/2 tsp garlic salt
  • 1/4 cup butter, melted (optional)
  • 1/2 cup canola oil
  • 1 lemon, cut into wedges
  • dried parsley flakes for sprinkling
And Action:

Season the tilapia fillets with a dash of each of the following seasonings: seasoned salt, black pepper, lemon pepper, and garlic salt. Mix the flour and seasonings in a large Ziploc bag. Add each fillet separately and shake to coat.

Pour the canola oil into a frying pan and heat over medium until the oil is medium-hot. Lower the heat to medium low. Add each fillet. Fry the fillets for 7-9 minutes on each side. Remove to a serving platter.

If using, drizzle with the melted butter. Squeeze the lemon over the fillets and sprinkle with parsley. Enjoy!

Nutritional Information Per Serving:
Calories: 210
Calories from fat: 60
Fat: 7g
Cholesterol: 70mg
Sodium: 250mg
Carbohydrates: 8g
Fiber: 0 g
Protein: 30g


June 13, 2011

Secret Recipe Club - Chocolate Chip Cookies

I am a new member to the Secret Recipe Club.  I am beyond giddy to be a part of this group. You too can join. Just click Secret Recipe Club.  Not knowing exactly what to expect I was anxious when waiting for my first blog assignment.

When I had checked my email one morning I was thrilled when I had seen that Amanda from Amanda's Cookin' had sent me my first blog assignment to recreate a recipe from. I immediately went to the blog and it was love at first sight.

For my first month as a member of the Secret Recipe Club I don't think I could have received a better blog to choose a recipe from.

Once A Month Mom.  "Helps fill your freezer by creating monthly menus using seasonal recipes." That is a concept I can get behind.


Everyday I would go to my bookmarks and click on the link to see what's new. I had a hard time deciding what recipe to try. I decided on Chocolate Chip Cookies. I needed a recipe I could make for a "Thank You" and an "I'm thinking about you" to two of my neighbors. I have a neighbor who regularly brings us fresh lettuce and another who lost his wife 4 years ago and doesn't know his way around the kitchen and has a major sweet tooth. What better way to show I care than with a batch of fresh baked Chocolate Chip Cookies?

These Chocolate Chip Cookies were unlike any I had ever made before. In the ingredients list was a box of Jello Vanilla Pudding Mix. What?!? I couldn't wait to see how these would turn out. I'm not much of a cookie person but when they are fresh out of the oven I can't resist two or three.

Because I was preparing these with the intent on giving them to others and it being a new recipe I had cooking anxiety. My first batch I second guessed myself on if they were done and ended up burning the bottoms. The second batch I didn't leave in long enough and were still doughy on the inside. Finally I had it figured out by the third batch. 9 minutes. No more, no less.

Fresh out of the oven these Chocolate Chip Cookies had a slight crunch on the bottom and were soft on the inside. Itty Bitty and I each sampled a cookie and the rest went to the neighbors. What a surprise! Both of my neighbors' eyes lit up and they were well received even for it being around breakfast time. One exclaimed, "Perfect timing to go with my coffee."

Because you can freeze the dough balls, thaw, and then bake, this recipe makes for a perfect last minute dessert to take to a get together, for a bad day pick-me-up, or to share with loved ones.

Makes about 4 Dozen

Stars of the Show:
  • 1/2 cup butter
  • 1/2 cup butter-flavored shortening
  • 3/4 cup white sugar
  • 1 cup brown sugar
  • 2 eggs
  • 2 teaspoons vanilla
  • 1 teaspoons salt
  • 1 teaspoons baking soda
  • 1 (3.4 oz.) box vanilla pudding mix
  • 2 1/4 cup flour
  • 1-2 cups chocolate chips, depending on your taste
And Action:

Cream together butter, shortening, sugars, eggs, and vanilla. Add flour, salt, baking soda, and pudding mix. Mix well, then stir in chocolate chips.

Place by teaspoonfuls on an ungreased cookie sheet. Bake in a preheated 350F oven for 8-10 minutes or until edges are lightly browned.

Cool a bit and enjoy with a glass of ice cold milk.

To Freeze: After baking, you can cool the cookies and then place in a freezer bag or container, then freeze. OR, if you enjoy a freshly baked cookie, place the dough or shaped balls in a freezer bag or container and freeze. Then when you are ready to bake, thaw the dough, shape into balls, and bake as above.


June 12, 2011

Ironic


June 11, 2011

Buttermilk Chicken Tenders

Buttermilk Chicken Tenders may not be the most fancy dinner option but these are top notch when compared to what you'd get when you dine out and light on the wallet. If you toddler is anything like mine and their first choice is chicken nuggets, you are in luck, they will gobble these up.

Moist and flavorful. Fried. Yes please! Great when served with your favorite dipping sauces or plain. They even make a great filling for a wrap or a salad topping. 
MyRecipes.com and All You, April 2006
Makes 6 Servings

Stars of the Show:
  • 1/2 cup buttermilk
  • 3/4 tsp Tabasco - Double this amount if you like 'em spicy.
  • 1 1/3 lb chicken tenders
  • 3/4 cup all-purpose flour
  • 2 tsp kosher salt
  • 1/8 tsp cayenne pepper - Double this amount if you like 'em spicy.
  • 2 eggs
  • 2 cups breadcrumbs - I only ended up using half this amount.
  • 3/4 cup vegetable oil
And Action:

Mix buttermilk and Tabasco in a resealable plastic bag. Add chicken tenders and marinate for at least 1 hour or up to 1 day.

In a shallow dish, mix flour with salt and cayenne pepper. In a shallow bowl, beat together eggs with 2 Tbsp. water. Place bread crumbs in a separate shallow dish.

Remove chicken tenders from buttermilk, draining any excess, and dredge individually in flour mixture, shaking off excess; then dip into egg, draining any excess. Next, dip chicken in bread crumbs, pressing gently into crumbs to coat. Place on baking sheet. (Chicken may be prepared up to 5 hours ahead; cover and refrigerate.)

In a large skillet, heat 1/4 cup vegetable oil over medium-high heat. When hot, add one third of chicken tenders and cook, turning, until golden, about 4 minutes. Transfer to a baking sheet and keep warm in 225 degree oven. Wipe out pan and repeat cooking procedure in 2 more batches with remaining oil and tenders. (I was able to cook all of my tenders at once and didn't need to keep them warm in the oven.)

Nutritional Information Per Serving:
Calories: 467
Fat: 32g
Saturated fat: 5g
Protein: 29g
Carbohydrate: 18g
Fiber: 1g
Cholesterol: 131mg
Sodium: 606mg

June 10, 2011

Itty Bitty's 3rd Birthday Bash - Disney Cars Theme

Happy 3rd Birthday Jason!!!
My Itty Bitty watches Disney / Pixar's movie, Cars, EVERY! DAY! He would be tickled pink if we would allow him to watch it all day long. He has the movie memorized. If you haven't seen it yet don't let him be the first one you watch it with or else he'll spoil the scenes. Haha!

The theme for his 3rd birthday party was a no brainer. A month in advance we began the party planning. Plenty of time. Stress free party, not counting the fact that Mr. Sideline Chef didn't think he would make it home for it. Luckily, he got into town a couple of hours before the party started.


Theme: Disney Cars.

Decorations: This year we went with Party City since we found all of our party supplies for less here than anywhere else. I shopped online since I like to see the entire selection and get the purchase over with in one shot.

Invitations / Guest List:  Homemade invitations. Since we live in Texas and have no family here in State our neighbors have become our extended family. They were all invited. I did have a big surprise that I managed to keep a secret from Mr. Sideline Chef and Itty Bitty. I flew out Mr. Sideline Chef's dad. The boys were beyond thrilled. His arrival was the best gift given.

Food: I love parties where the food correlates with the theme. So I set out to create a menu that was a play on words with the characters from the movie.
  • For the party table I was debating between: Flo's V-8 Cafe and "Ka-Chow Hall."
  • Since Mr. Sideline Chef works in the trucking industry I knew he could get his hands on a traffic cone. I had him clean it up with a Magic Eraser and set in on the table as "Sally's Cozy Cone Motel". My original idea was to purchase some mini orange cones (like what they use at soccer practices) and put some party favor treats in there. I went over budget, no surprise there, and decided to just go the for free route. Cleaned up traffic cone it was as a decoration.
  • Fillmore's Organic Fruit and Veggie "Dipsticks" with Ranch
  • "Chick"en Wings
  • "Mack"aroni Salad (recipe below)
  • Meat and cheese tray with Cars toothpicks
  • Hot"docs"
  • Beverages
  • Chocolate cake (I used a box mix) with the Ultimate Vanilla Buttercream Frosting (recipe below).
  • Traffic Lights - Rice Krispy Treats dipped in Chocolate Glaze and then M&Ms (red, yellow, and green) set on top.
  • Mater Oil Sundaes - Vanilla ice cream with Magic Shell topping.


Gifts: Anything Cars related was a sure bet for my Itty Bitty. He received a boxed set of die cast cars, a Bubble Mater (highly recommended if your little one loves bubbles), Cars mechanics t-shirt, Cars World Atlas, bouncy ball, coloring book, remote control Mater, interactive Cars book, and a placemat and cup. Along with a bunch of other things non-Cars related. We need to buy him a new toybox for all the new toys.

Tuna Salad - "Mack"aroni Salad
Recipe passed along to me from Mr. Sideline Chef's Grandma Gail
Mr. Sideline Chef's dad remarked, "It isn't Summer until this salad is made.
Makes 4-6 Servings
Stars of the Show:
  • 2 cups cold cooked macaroni
  • 1 can tuna, drained and flaked
  • 1/2 cup diced cheddar cheese
  • 1/2 cup frozen green peas, thawed
  • 3/4 cup slaw dressing - Such as Marzetti's or Marie's.
  • 2 tbsp pickle relish
And Action:

Combine all ingredients and chill until ready to serve. Don't forget to put it on ice if it's an outdoor party.

MyRecipes.com and Southern Living, March 2009
Makes 2 Cups
Edible cake image was purchased online on Ebay. Itty Bitty pulled the candles out of the cake and didn't want us to sing.
Stars of the Show:
  • 1/2 cup butter, softened
  • 2 tsp vanilla bean paste - I had to order this online. I highly recommend this ingredient. Such a flavor punch and more pronounced vanilla note than extract.
  • 1/8 tsp salt
  • 1 (16 oz) bag powdered sugar
  • 3 to 5 tbsp milk
And Action:

Beat first 3 ingredients at medium speed with an electric mixer until creamy.

Gradually add powdered sugar alternately with 3 Tbsp. milk, 1 Tbsp. at a time, beating at low speed until blended and smooth after each addition. Beat in up to 2 Tbsp. additional milk for desired consistency.


Related Posts Plugin for WordPress, Blogger...