January 31, 2011

Culinary Smackdown Battle - Hand Held Meat "Pies"

I woke up to quite a surprise this morning when I logged onto my blog and found a comment that I had won January's Culinary Smackdown Battle - Salmon on Brenda's blog over at, Brenda's Canadian Kitchen. Do you remember that Smoked Salmon Cardamom Spread? Yea that one! I raved about how incredibly delicious this spread was and I felt like a winner just for getting to make and eat it! Haha!

Now that I am metaphorically crowned Culinary Smackdown Battle winner it is my honor to get to host February's Culinary Smackdown. I have thought hard but not so long on what the challenge would be. I decided to go with Hand Held Meat "Pies". The possibilities are endless. Think along the lines of HotPockets, calzones, kolaches, etc. Meat in a shell that can be ate with your hands and maybe a fork to pick up any pieces that fall out.

Culinary Smackdown Battle - Hand Held Meat Pies will held throughout the month of February. Entries may be submitted starting February 1st, 2011 - February 27th, 2011. I will be announcing the winner on the morning of February 28th. All you have to do to enter is link up your entry below. I'll be looking forward to seeing all of the wonderful ideas you're going to submit!

I'm sure you're wondering what's in it for you. The winner will receive a $10.00 gift card for Barnes and Noble. Put it towards a new cookbook, DVD, or even towards a Caramel Macchiato from a Starbucks within the store. It's also redeemable online. If coffee is what you're putting it towards I recommend going in store for that purchase. Could you imagine the mess? Haha!

Let's get to linking up those Hand Held Meat "Pie" entries now! It doesn't have to be a new recipe. I'm more than happy to see what you've maybe already made on your blog. Only one entry per person please. If you would do me a favor pretty pretty please, mention my link/Pretend Chef in your submitted post. That would be greatly appreciated to help generate buzz. What's a competition without other competitors? A for sure win. Haha!

January 30, 2011

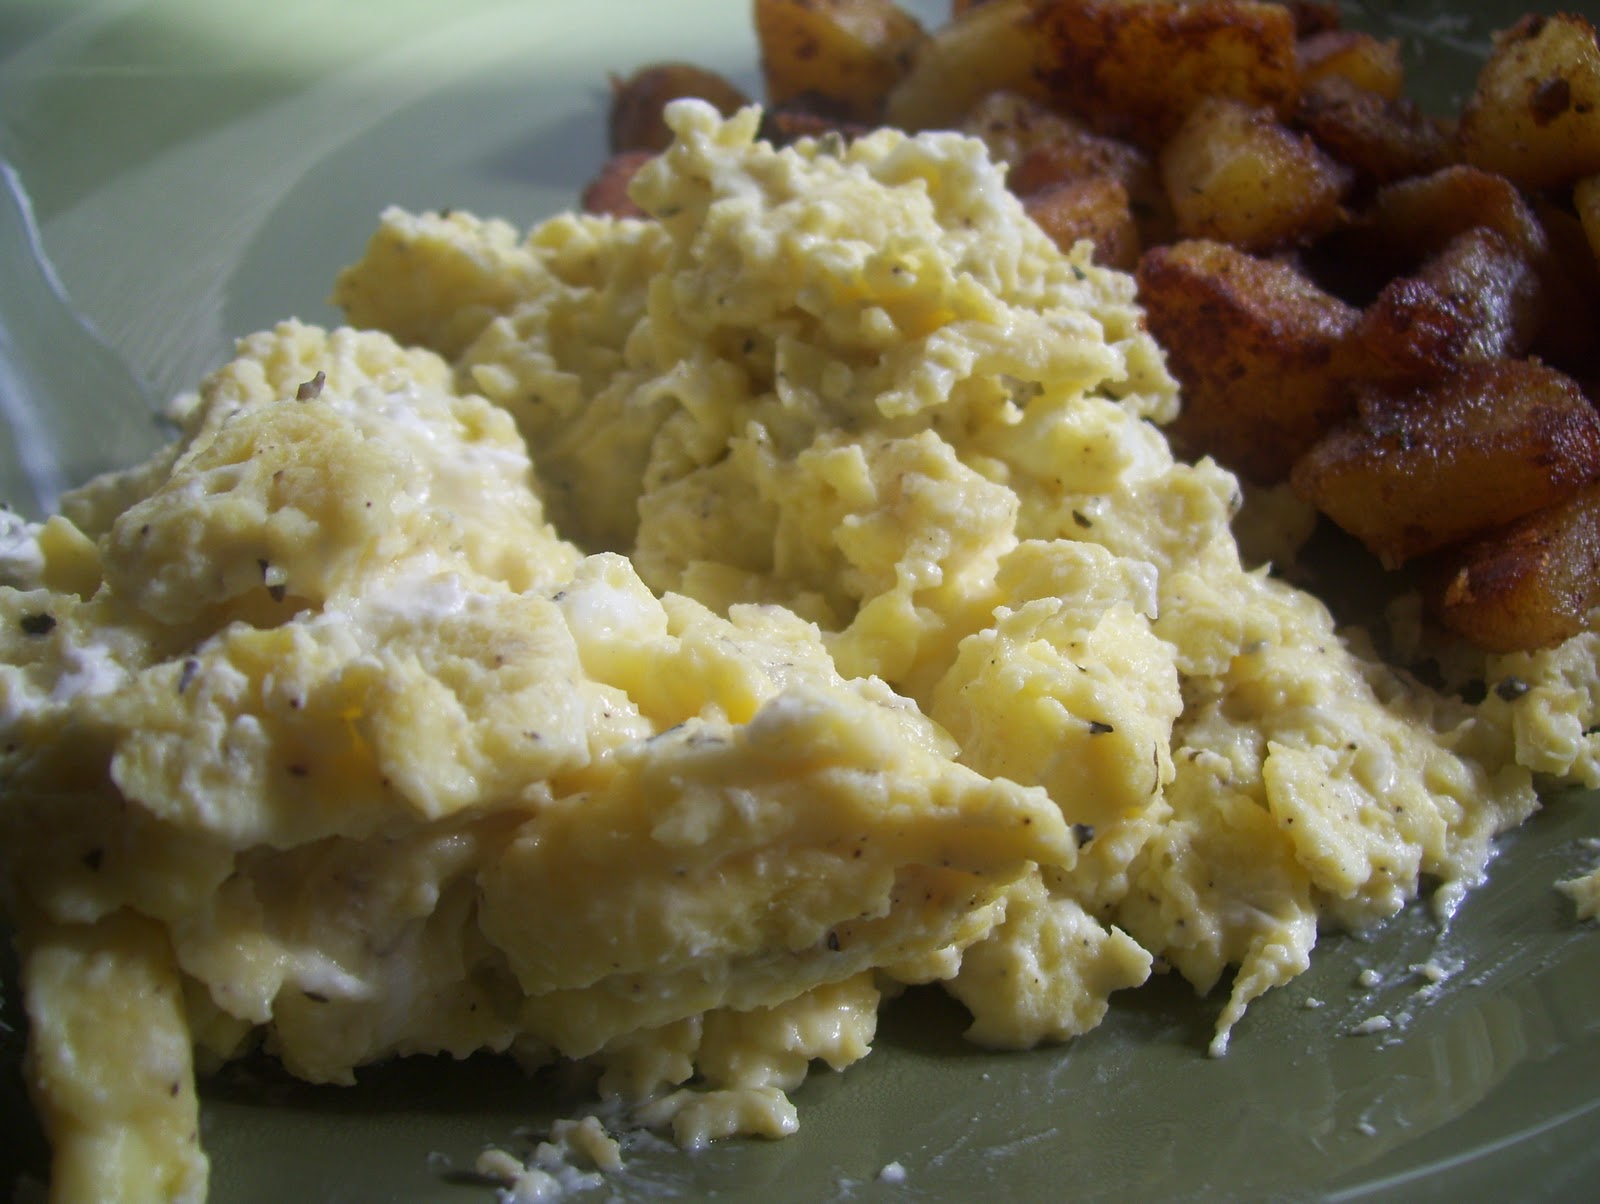
Cream Cheese Scrambled Eggs

Breakfast can either be my favorite meal or least favorite meal of the day. When it's the usual bowl of cold cereal with milk, plain oatmeal, or even 2 egg whites with dry toast I grow bored of the monotony. Throw a twist on the usual and then I look forward to preparing breakfast and eating it.

If you're going to wake up early and prepare something it better be worth your while. Eating breakfast is a great way to jump start your day and provide you with energy needed to carry on the day, that is of course, after a cup or two of coffee. Or a pot of coffee for some.

After making the Yukon Gold Potatoes with Clarified Butter for dinner I knew reheating them with my breakfast would be a hearty side instead of dry toast. Egg whites are a great source of protein and I do like them but I can't stand to eat them everyday. I'm not really a scrambled egg fan but on occasion scrambled eggs with cheese sound irresistible. While searching through, MyRecipes, I found a recipe for Cream Cheese Scrambled Eggs. They sounded and looked incredibly creamy. I figured they would be a great change up for breakfast.

Cream Cheese Scrambled Eggs surely did not disappoint. They were so smooth and creamy. Perfect with the Yukon Gold Potatoes with Clarified Butter and a side of applesauce. The addition of basil also added a very fresh taste and was a new twist on scrambled eggs I am looking forward to making again. This made for such a hearty breakfast.
MyRecipes.com and Southern Living, January 2005
Makes 4 to 6 Servings

Stars of the Show:
  • 8 large eggs
  • 1/4 cup milk
  • 1/2 tsp salt
  • 1/2 tsp pepper
  • 1 tbsp butter
  • 1 (3 oz) package cream cheese, cut into cubes
  • 1/3 cup fresh basil (optional)
And Action:

Whisk together first 4 ingredients.

Melt butter in a large skillet over medium heat. Add the egg mixture and cook without stirring until the egg begins to set on the bottom. Sprinkle the cubed cream cheese over the egg mixture. Drawing a heat resistant spatula across the bottom of the skillet to form large curds.

Cook eggs until thickened but moist. Remove from the heat and stir in the basil before serving.

*Note: If you prefer a lighter version substitute 2 cups of egg substitute for the eggs and 3 ounces of light cream cheese instead of regular. Proceed as directed.

January 29, 2011

Yukon Gold Potatoes Sautéed in Clarified Butter

Clarified butter. Never heard of it. From clicking the Clarified Butter link on the original recipe I learned that milk solids are skimmed away leaving the clarified butter to have a higher smoke point than just regular butter. This once again is another reason I call myself the Pretend Chef. I learn something new every day and even after attempting to look in the saucepan of melted butter nothing looked solid. Hmmm.... maybe I just didn't know exactly what I was looking at. I just decided not to bother and continued making the recipe with the butter I had just melted. Saved myself one step as far as I was concerned.

Growing up my mama would make homestyle potatoes with breakfast many mornings. I loved her well seasoned potatoes with my eggs and bacon. Oh how I miss living under here roof and sitting around her table! Although I didn't make these potatoes for breakfast I have plans of reheating them with my eggs and making sort of a scramble.

Whether you know what or how to make clarified butter or just use regular butter these potatoes are amazing! Simple. Yes. But oh so flavorful! Crispy and creamy. The Yukon gold potatoes cook for 20 minutes in a skillet to get tender and browned before being seasoned with parsley, garlic, salt and pepper.

These would make a great side dish for breakfast or dinner. I prefer them for breakfast with a poached egg over the top so the runny yolk runs down and onto the potatoes! Yummy!

MyRecipes.com and Cooking Light, January 2007
Makes 8 Servings (Serving size = 1 cup)

Stars of the Show:
  • 3 pounds Yukon gold potatoes, peeled and cut into 1 1/2-inch pieces
  • 1/4 cup clarified butter - I used Land O' Lakes Butter with Olive Oil and didn't skim any milk solids off the top. Remember... I had no clue what I was looking for.
  • 2 tbsp fresh flat-leaf parsley - I used dried parsley.
  • 1/2 tsp salt
  • 1/4 tsp black pepper
  • 1 garlic clove, minced
And Action:

Place the potatoes in a pot covered with water and bring to a boil. Reduce heat and simmer for 2 minutes. Drain and let stand for 2 minutes.

Heat the butter in a large nonstick skillet over medium high heat. Add the potatoes to the skillet, reduce the heat to medium and cook for 20 minutes or until the potatoes are nice and browned and tender. Stir occasionally. Stir in the parsley, salt, pepper, and garlic.

Nutritional Information:
Calories: 197 (29% from fat)
Fat: 6.4g (sat 4g,mono 1.8g,poly 0.2g)
Protein: 4.1g
Carbohydrate: 30.2g
Fiber: 2.1g
Cholesterol: 16mg
Iron: 1.5mg
Sodium: 158mg
Calcium: 2mg

January 28, 2011

Cloverleaf Honey Wheat Rolls

I cannot stand wasting food. I dislike it so much that I have created a spreadsheet of ALL the food items that I have in the house and keep it updated on a daily basis. I even color code it with what is expiring during the current month and aim to make as much as I can to use up that ingredient. It's a great tool to have when I menu plan and now nothing gets pushed to the back of the cupboards and forgotten about. Having my spreadsheet has also help cut our food bill significantly.

Seeing that my 100% whole wheat flour was expiring by month's end I decided it was best to put it to use. I searched my favorite recipe website, MyRecipes, and did a quick search for whole wheat flour. Cloverleaf Honey Wheat Rolls. I had all of the other ingredients on hand and it wasn't a hard decision to make these.

I had tried another recipe similar to these that were good but not great, Herb Cloverleaf Rolls. Their pull apart shape made me giddy. I was excited to get in the kitchen and give the Cloverleaf Honey Wheat Rolls a go. When isn't honey and wheat a winning combination? Cooking Light recipe also. Can't go wrong.

Working with dough no longer intimidates me like in my earlier blogging days. Is that weird to say considering the fact that I've only been at this for three months? I use to question every step of the bread making process and now I can breeze through a recipe such as this without any self doubt. I've come a long way.

After these rolls got out of the oven letting them cool down enough to handle was pure torture. The apartment smelled of fresh bread and the sweetness of the honey had me dying to get my hands on these. I popped them out of the muffin pan and the time it took to photograph them was enough to let them cool.
I pulled one of the "cloverleafs" off and the steam rose. The smell was so sweet and tantalizing. They looked so airy and light. I raise the portion to my mouth and before I was able to take a bite itty bitty had also taken notice of the fresh out of the oven love and raced over to stake claim on a roll too. Both of us shared a first bite together. "Nom-me!" I couldn't agree more. Now if only Mr. Sideline Chef would have been home to see if these Cloverleaf Honey Wheat Rolls would be deemed "engagement" worthy. Guess I'll just have to make them again... oh darn! Haha!

MyRecipes.com and Cooking Light, September 2002
Makes 1 dozen (Serving size = 1 roll)
*To Freeze: Wrap the baked rolls in foil and reheat at 350º for 10 minutes or until warm.
Stars of the Show:
  • 1 package dry yeast (2 1/4 tsp)
  • 1 cup warm water (100° to 110°)
  • 2 cups bread flour, divided
  • 1 cup whole wheat flour
  • 3 tbsp honey
  • 2 1/2 tbsp butter, melted
  • 1 tsp salt
  • cooking spray
  • 1 tbsp water
  • 1 egg
And Action:

Dissolve the yeast in 1 cup warm water in a large bowl and let stand for 5 minutes. Add 1 1/2 cups bread flour, whole wheat flour, honey, butter, and salt to the yeast mixture stirring well until blended. Add 1/4 cup bread flour and stir to form a soft dough.

Turn the dough onto a well floured surface. Knead until smooth, about 8 minutes. Add enough of the remaining bread flour, 1 tbsp at a time, to prevent dough from sticking to hands.

Place the dough in a large bowl coated with cooking spray and turning the top to coat. Cover and let rise in a warm place (85°), free from drafts, for 1 hour or until doubled in size. Punch dough down. Cover and let rest for 5 minutes.

Preheat oven to 425°.

Coat a muffin pan with the cooking spray. Divide the dough into 12 equal portions. Working with one portion at a time, separate each portion into 3 balls. Place the 3 balls into one muffin cup. Cover and let rise 25 minutes or until doubled in size.

Uncover the dough. Combine 1 tbsp water with the egg and brush over the tops of the dough. Bake for 12 minutes or until lightly browned. Serve warm.

Nutritional Information:
Calories: 152 (18% from fat)
Fat: 3g (sat 1.6g,mono 0.9g,poly 0.2g)
Protein: 5.1g
Carbohydrate: 27.3g
Fiber: 2g
Cholesterol: 24mg
Iron: 1.5mg
Sodium: 206mg
Calcium: 4mg

I'm linking this recipe to:

January 27, 2011

Caramelized Onion Potato Spread

Tuna sandwiches and salads can become so monotonous for lunches. I needed something to shake up my lunch rotation. While searching my favorite recipe website, MyRecipes, I found this recipe for Caramelized Onion and Potato Spread. The nutritional stats for the spread made me do a double take. 45 calories for 3 tablespoons of the spread? Whoa! That is incredible! After reviewing the nutritional stats I figured I would stick with my tuna sandwich and instead have this as a snack with some low fat crackers.

If you recall my first attempt at caramelizing onions didn't turn out so well. They instead burned to a crisp. I still ate them to avoid hurting my own pride. I was a bit nervous to try it again. After the onions started to turn translucent I turned the heat on the stove down and let them turn to a golden brown color instead of black. Job well done. Hope has been restored.
Reminds me of when my mom would make hot dogs for us for dinners and she'd make caramelized onions to put on hers.
This spread has a base of Yukon gold potatoes mashed with navy beans and the caramelized onions blended in. Balsamic vinegar lends another layer of flavor that pairs well with the onions and potatoes. Yogurt and sour cream are then stirred into the mix and then the spread is seasoned with salt and pepper. The original recipe states to let this chill in the fridge for one hour before serving. Pssh... I thought this was fantastic on it's own while it was still warm. Not wanting to blow it by eating this by the spoonful I followed through and demonstrated extreme willpower and brought myself to put it in the fridge.

After it's chill out time I grabbed for my box of crackers and grabbed out the proper portion size, 5, and scooped myself 3 tablespoons worth of the Caramelized Onion Potato Spread. My snack ran me 115 calories. So satisfying and filling. I'll be looking forward to snack time tomorrow.

I also have set out to complete a sort of "bucket list" if you will but for things I want to cook before I turn 24 in June. I call it "Stir the Pot" because that only seems more fitting since this is after all a food blog. Number three on my list was to find a spread for our Game Days that could compare to the Smoked Salmon Cardamom Spread. These two spreads are on two different sides of the flavor spectrum that I couldn't compare one to the other. Mission accomplished. This spread will be fantastic for our next Game Day which will be Super Bowl. If you haven't heard our beloved Steelers are going to the Super Bowl and they're headed close to us in Dallas! Mr. Sideline Chef has already made arrangements for us to go up to Dallas for the weekend and bar hop. (((Hines Ward))) How about the two of us smiling over a cup of cocoa after the game?

MyRecipes.com and Cooking Light, December 2007
Makes 22 Servings (Serving size = 3 tbsp spread)

Stars of the Show:
  • 2 tsp olive oil
  • 3 1/2 cups finely chopped onion
  • 1 lb peeled baking potato, cut into 1-inch cubes - I used Yukon gold potatoes.
  • 3/4 cup canned navy beans, rinsed and drained
  • 1 tsp balsamic vinegar
  • 3/4 tsp salt
  • 1/4 tsp black pepper
  • 1/2 cup plain fat free yogurt
  • 2 tbsp fat free sour cream
And Action:

Heat oil in a large nonstick skillet over medium high heat. Add the onions to the skillet and saute for 5 minutes. Reduce heat to medium low and cook for 45 minutes or until golden brown, stirring frequently.

Place the potatoes in a medium pot covered with water. Bring to a boil and then reduce the heat to a simmer and cook for 12 minutes or until very tender. Drain and cool for 5 minutes. Combine the potatoes and beans in a large bowl (I just put them into the pot I used to boil the potatoes) and mash. Add onion, vinegar, salt, and pepper stirring well. Add yogurt and sour cream and stir until blended. Chill at least 1 hour before serving with crackers, baguette slices, or breadsticks.

Nutritional Information:
Calories: 45 (10% from fat)
Fat: 0.5g (sat 0.1g,mono 0.3g,poly 0.1g)
Protein: 1.5g
Carbohydrate: 9.1g
Fiber: 1.1g
Cholesterol: 0.0mg
Iron: 0.4mg
Sodium: 87mg
Calcium: 23mg

Before you set out to make this spread how about visiting Smart Girl Reviews and enter for a chance to win some Cowgirl Chocolates. Drool worthy! Who doesn't love a chance to win free products? What are you still doing here. Head over to Smart Girl Reviews and tell her the Pretend Chef sent you! Thank you in advance!

January 26, 2011

Pink Lemonade

Do I dare say I'm not a lemonade fan? NEVER do I order lemonade. From anywhere. Not because I don't like it but because it's just not my favorite. Mr. Sideline Chef on the other hand will have me buy lemonade mixes and end up dumping in so much of the mix into a 16 oz bottle of water that it literally makes you pucker. He likes it tart and only in the Summer.

While it's not Summer time, obviously, and no we're not having Summer weather we did have a beautiful Sunday. The weather was perfect for a picnic at the park and all I wanted to do was take the football before the big game and go play catch with my boys and let itty bitty get out of the house and get some of his pent up energy out. Have to take full advantage of these sunny days before the rainy weather keeps us indoors.

We ended up missing our window of opportunity from the time itty bitty woke from nap and kickoff. Even though we ended up not going to the park I still wanted to make the Pink Lemonade. I ended up making it on Monday afternoon.
Simple syrup. Check. Fresh hand squeezed lemon juice. Check. Water and grenadine. Check. Strawberry garnish. Check. It was that simple. This recipe came together really quickly and into the fridge it went to chill out for a couple of hours.

Lemonade does not make me excited. Now Pink Lemonade on the other hand makes me giddy so does Red Robin's selection of lemonades. This Pink Lemonade was no exception. It looked so beautiful mixed in the glass pitcher with the diced strawberries floating on the top. Once poured into my glass I couldn't wait to take that first sip. More sweet than sour. The grenadine and strawberries along with the simple syrup balanced out the tang from the lemons. Lip smackin' good!

The picnic will need a redo and this will for sure make it in the cooler... or maybe Mr. Sideline Chef is reading this and will make it for me and pack a picnic on Valentine's Day... a girl can dream... in reality I'll be the one packing the picnic and he'll be along for the ride. No matter what occasion you make this for it'll be a hit.

MyRecipes.com and Southern Living, July 2001
Makes 3 quarts

Stars of the Show:
  • 1 cup sugar
  • 10 cups water
  • 1 cup lemon juice
  • 1/4 cup grenadine
  • 1/2 pint of fresh raspberries or strawberries (optional) - I used strawberries. Yummy!
And Action:

Bring sugar and 1 cup of water in a saucepan and boil, stirring constantly until the sugar dissovles. Cool. Pour into a large container or pitcher. Stir remaining 9 cups water, lemon juice, grenadine, and if desired the raspberries or strawberries. Chill for 2 hours.  

January 25, 2011

Apple Cinnamon Granola

My breakfast rotation has just received a shake up. Welcoming to the lineup Apple Cinnamon Granola served over a big bowl of plain yogurt. We all know plain yogurt is crap healthy for us and this just adds a whole other layer of healthiness and makes choking down eating plain yogurt that much more rewarding to your waist line and your taste buds.

If you want to torture yourself you can do what I did. I had this toasting up in the oven while I broke a sweat on the treadmill jumping off only long enough to wash my hands and stir the granola every half hour. The aroma of cinnamon filled the air and the oven warmed our tiny apartment making the aroma that much more intense. I planned my workout and shower to end right about the time the granola finally had a chance to fully cool down so I could eat it afterward. Such a rewarding treat!

This was my first time making granola and this came out perfectly crunchy and sweet. The best part were the walnuts with some of the oats stuck to the outside from the applesauce and brown sugar. For this being my first granola recipe I can happily say I'd be happy if this becomes the only one I make. Sure, that would be boring so I could see how swapping the applesauce for other fruit purees could work and switching up the dried fruits as well would prevent this granola rotation from becoming tiresome. Whatever floats your boat! Make yourself and your taste buds happy. It's such a versatile recipe so make it your own.

Making homemade granola is much lighter on the budget than purchasing premade mixes. It is also simple to prepare with easy cleanup. What more could you ask for in a recipe? The fact that it is a Cooking Light recipe should be a perk as well.

Apples and cinnamon are a winning combination and you can't beat that nutty-apple cinnamon taste on a cold winter's day.

MyRecipes.com and Cooking Light, November 2005
Makes 6 cups (Serving size = 1/2 cup)

Stars of the Show:
  • 3 cups regular oats
  • 1 cup Cheerios
  • 1/3 cup oat bran cereal
  • 1/3 cup finely chopped walnuts
  • 2 tsp ground cinnamon
  • 1/4 tsp ground cardamom
  • 2 tbsp butter
  • 1/3 cup applesauce
  • 1/4 cup honey
  • 2 tbsp brown sugar
  • cooking spray
  • 1 cup chopped dried apples
And Action:

Preheat the oven to 250°.

Combine the first 6 ingredients in a large bowl and stir well to combine.
Melt 2 tbsp butter in a saucepan over medium heat. Add the applesauce, honey, and brown sugar to the pan and bring to a boil. Cook for 1 minute stirrinf frequently. Pour the applesauce mixture over the oat mixture stirring to coat. Spread mixture evenly over a baking sheet that has been coated with cooking spray. Bake at 250° for 1 1/2 hours stirring every 30 minutes. Allow to cool completely. Stir in the chopped dried apples.

Store the Apple Cinnamon Granola in an airtight container for up to one week.

Nutritional Information:
Calories: 196 (27% from fat)
Fat: 5.8g (sat 1.4g,mono 1.6g,poly 2.2g)
Protein: 4.4g
Carbohydrate: 35g
Fiber: 4g
Cholesterol: 5mg
Iron: 2.2mg
Sodium: 128mg
Calcium: 28mg
Related Posts Plugin for WordPress, Blogger...